

What This Page Covers
Once a proactive agent detects a pattern worth acting on, a proposed action appears in your AI Inbox. This page walks you through exactly what to do when one shows up — how to understand the context, edit the message, and choose the right action.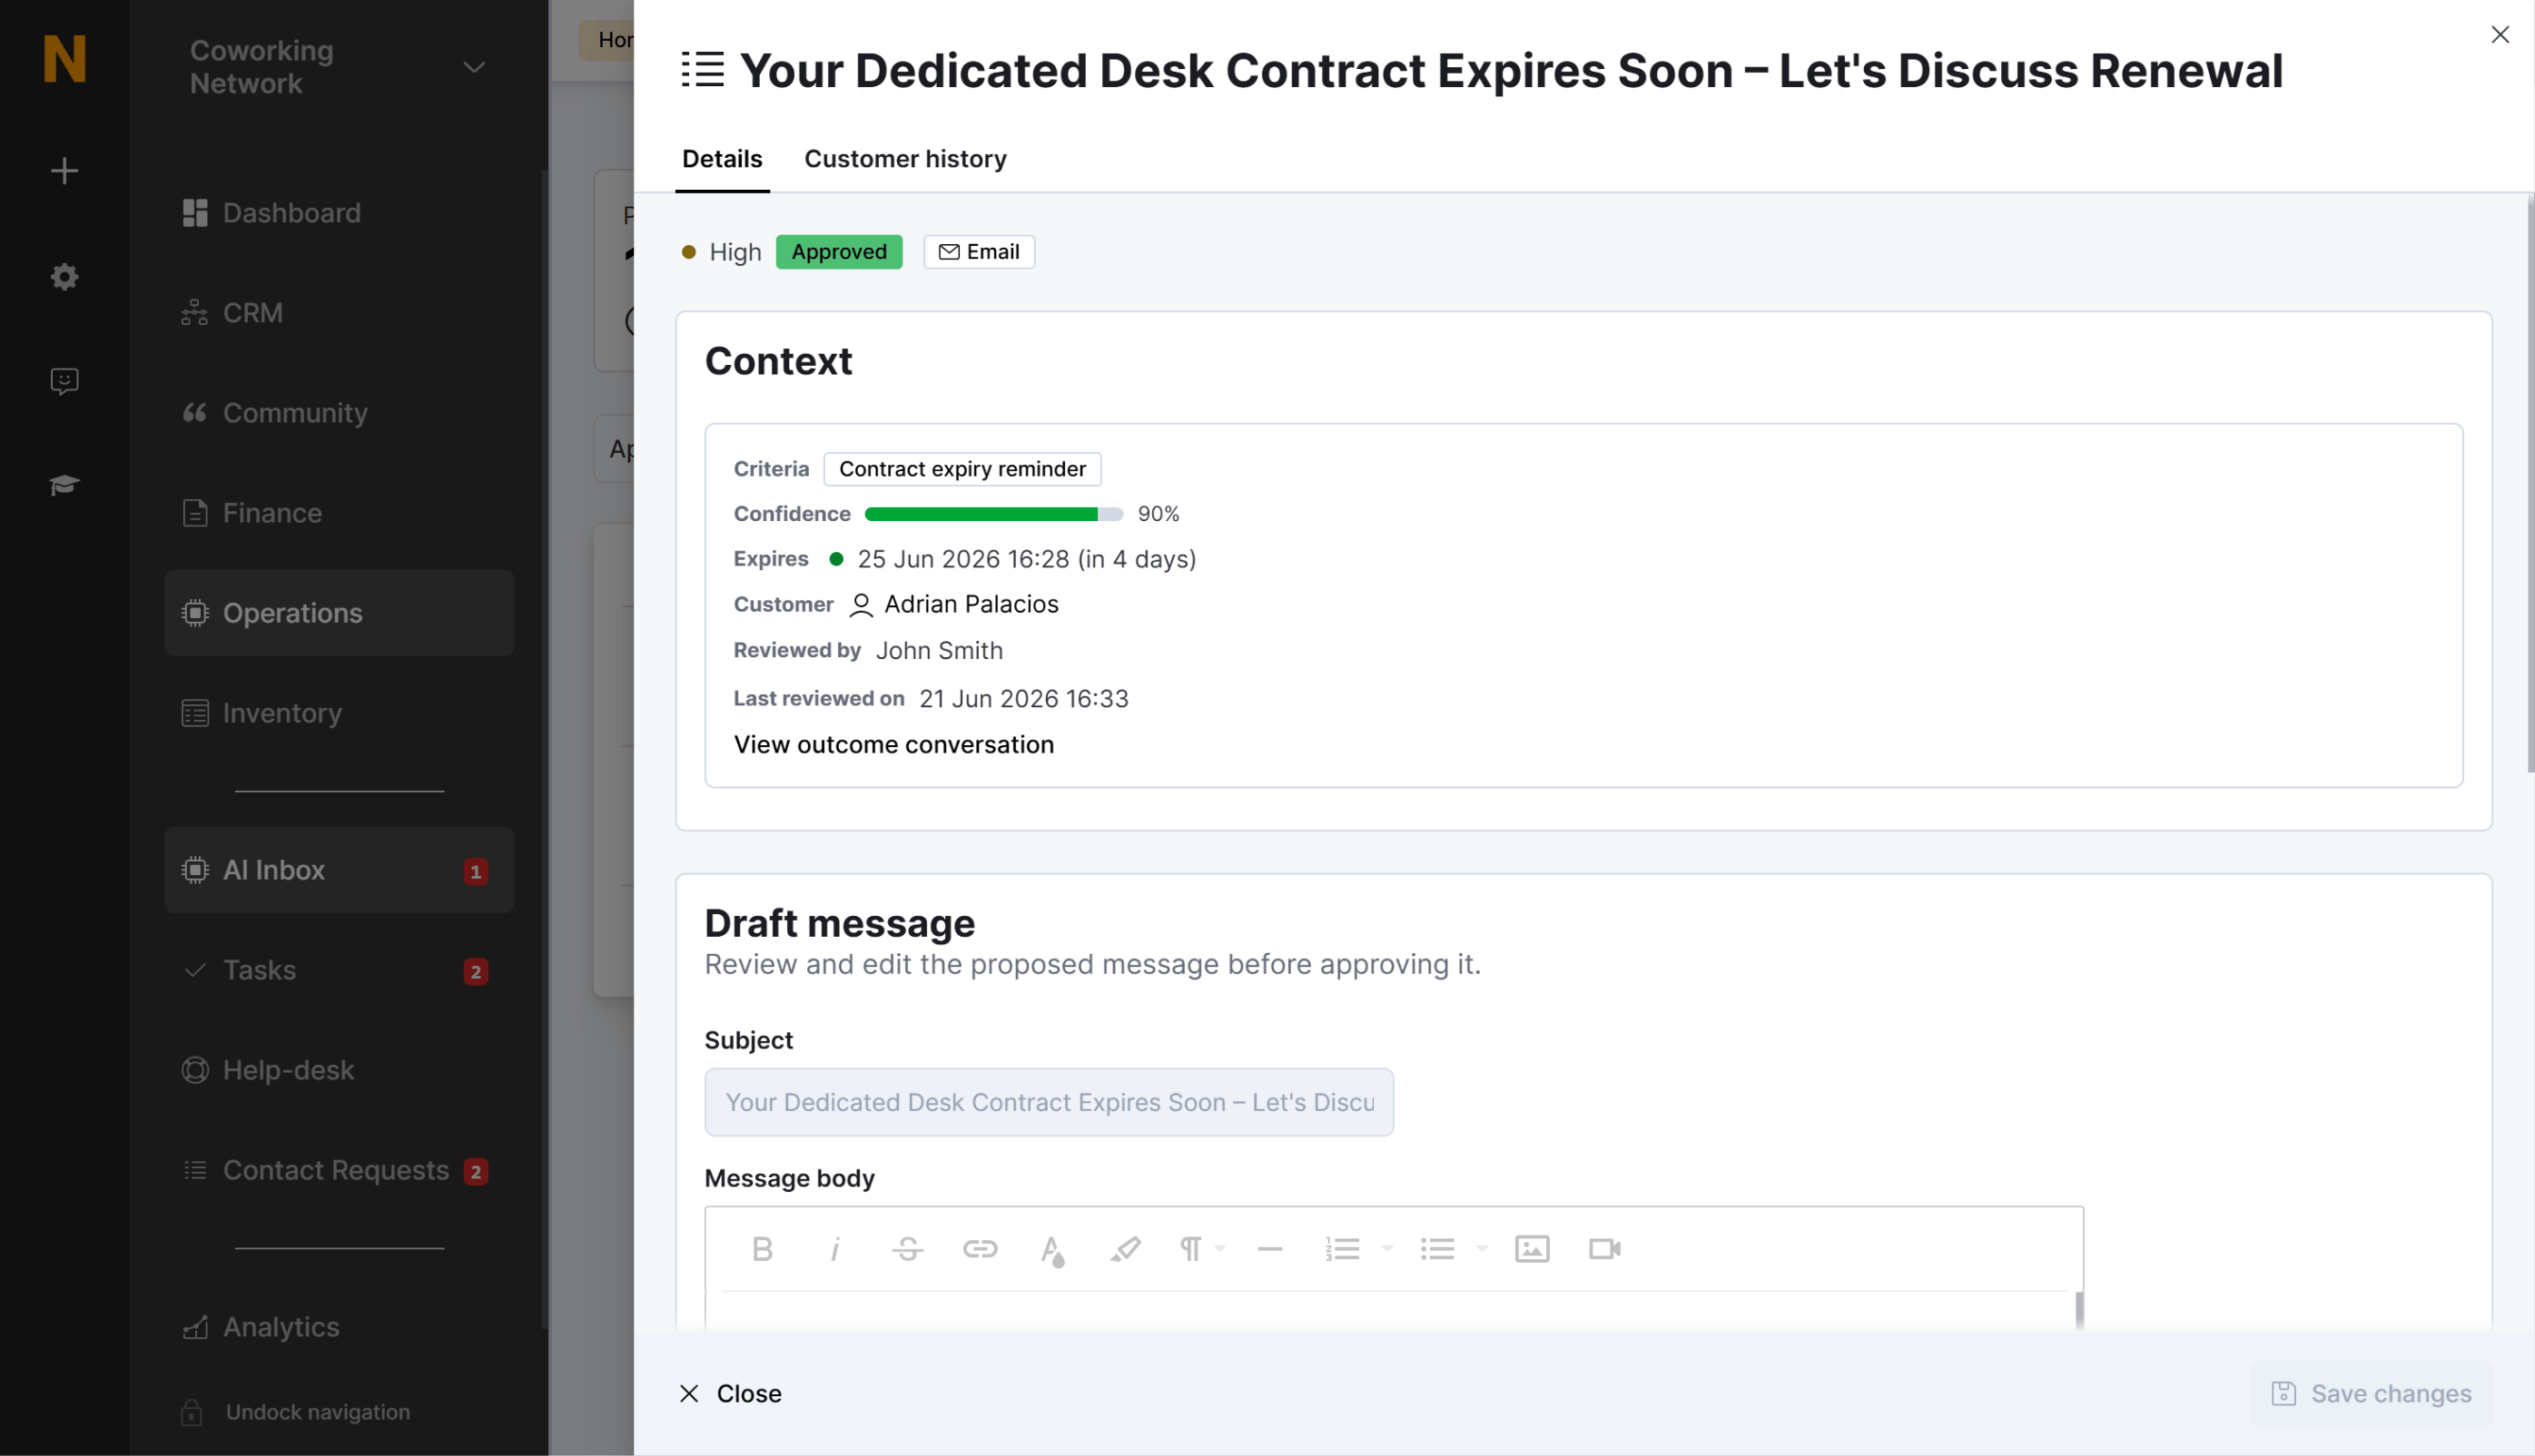
Opening a Proposed Action
From the inbox list:- Navigate to Operations → AI Assistant → AI Inbox.
- Click anywhere on the action row you want to review.
- The detail panel opens, showing Context & History on the left and the Message Draft on the right.
Understanding the Context
The left panel gives you everything you need to decide whether the proposed action makes sense.Customer Information
- Full name and company name (if applicable)
- Customer type — Member (has active contract), Contact (no contract), or Lead
- Quick link to open the full customer profile
Why This Was Proposed
This section explains the trigger that created the action:- Agent name — Which proactive agent generated this (e.g., “Due Invoice Reminders”).
- Criteria — A short label for the trigger type.
- Reason — A plain-language explanation of what the AI detected. For example: “Invoice #INV-2024-0847 is 5 days overdue. Customer has a strong payment history but missed this payment, which is unusual.”
Confidence Score
The confidence score reflects how strongly the detected situation matches the agent’s criteria. It’s shown as a percentage with a color-coded progress bar:- Green (80–100%) — High confidence. The AI is fairly certain this action is appropriate.
- Yellow (50–79%) — Moderate confidence. There are some signals, but they may not be definitive.
- Red (0–49%) — Low confidence. The AI is uncertain — review carefully before approving.
Related Activity
When the action is linked to a conversation with the customer, the context panel shows:- Sent messages — Messages already delivered to the customer as part of this exchange.
- Escalated tickets — Any help desk tickets raised from the same conversation.
- Linked conversation — A shortcut to open the full AI conversation for this exchange.
Review Details
Once an action has been processed, the context panel also shows who reviewed it (Reviewed by) and when (Reviewed on), so your team can trace decisions.The Message Draft
The right panel shows the message the AI has composed. You can review it as-is or edit it before sending.The Draft
The draft consists of a Subject line and a Message body. Both are editable directly in the panel while the action is Pending or Snoozed — there is no separate edit mode. Once the action has been processed, the fields are locked for viewing. Tip: Keep the core message intact. Variables like{{customer_name}} and {{invoice_number}} are auto-replaced with real data when the action is sent — editing them manually is possible but usually unnecessary.
Delivery Channel
Below the draft you choose the Delivery channel — how the message reaches the customer:- AI Email — Standard email to the customer’s address.
- Email Message — Delivered through the member portal. You can optionally pick a connected email account to send from, which enables reply tracking.
- WhatsApp — Requires the customer to have messaged your location within the last 24 hours; otherwise a pre-approved opt-in template is sent first and the action waits for the customer’s reply.
- Voice — An AI voice call. Only sent during business hours; if approved outside those hours, the action is automatically deferred until the next available window.
- Help Desk — Creates a support ticket instead of contacting the customer. You can assign a department, set a priority, and add internal notes visible to your team only.
- Voice not enabled — The Voice AI agent must be enabled in your location’s settings before voice messages can be sent.
- WhatsApp not configured — A WhatsApp sender number must be configured in your location’s settings first.
- Invalid or missing phone number — Voice and WhatsApp require the customer to have a valid mobile number in international format (+XX…). Sending is blocked until it’s fixed.
- Deferred to business hours — Voice messages approved outside business hours are queued automatically.
Taking Action: Three Options
Every pending or snoozed action gives you three buttons at the bottom of the detail panel. Here’s when and how to use each one.Approve & Send
Use when the message is accurate, the tone is right, and you’re happy with it as-is.- Review the customer context and the message draft.
- (Optional) Add review notes in the text area at the bottom — these are internal notes for your team, not sent to the customer.
- Click Approve & Send (green button with a check icon).
- Confirm in the modal that appears.
- The message is sent immediately through the selected channel.
- The action status changes to Approved.
- The customer receives the email, WhatsApp message, or voice call within seconds.
- Any reply from the customer starts a two-way conversation in AI Conversations.
- The action is logged in the customer’s history and tracked in your metrics.
Snooze
Use when you want to revisit the action later — perhaps after following up with the customer directly, waiting for more information, or simply because you’re busy right now.- Click Snooze (orange button with a clock icon).
- Choose a duration from the menu:
- The action moves to the Snoozed segment and returns to pending after the selected period.
Reject
Use when the action isn’t appropriate — the issue is already resolved, the timing is wrong, or you’d prefer to handle it personally.- Click Reject (red button with a cross icon).
- Confirm in the modal that appears.
- The message is not sent to the customer.
- The action status changes to Rejected.
- The action is removed from the pending queue.
- The rejection is logged for analytics — this helps the system improve future proposals.
Rejection reason tracking is planned for a future release. For now, rejections are logged internally to help improve agent criteria over time.
Review History
Once an action has been reviewed, you can see who reviewed it and when:
This review history appears in the Context section of the detail panel and is visible in the Approved and Rejected segments.
Status Reference
Understanding the different statuses helps you know where each action stands:Best Practices for Reviewing
Daily Review Routine
For the best results, check your inbox 2–3 times per day:- Morning — Review overnight actions first thing. Prioritize Critical and High priority items.
- Midday — Catch up on anything that came in since your morning review.
- End of day — Clear any remaining pending items before logging off.
Prioritizing by Priority Level
Building Confidence Over Time
As you use proactive agents more, your approval patterns will help the system learn:- Consistent approvals for a specific agent → higher confidence scores over time.
- Frequent rejections → the agent may lower its confidence or flag actions for closer review.
- Review notes (when available) → provide feedback that trains future proposals.
AI Inbox
Understand the inbox interface, filtering, and segments.
Configuring Agents
Adjust agent settings based on your review patterns.